






Texture comes up often in 3D printing, but it’s almost always about removing it. Things get complicated when you start trying to add texture to models—at least that’s what I thought. A free tool completely changed how I think about 3D printing textures.
The tool is called BumpMesh, and it’s from the folks at CNC Kitchen. This is a completely open-source, web-based tool. No downloading and installing software is required. The results from BumpMesh look very professional and impressive, but it takes almost no effort to use.
The easiest way to add texture to 3D models
Don’t mess around with 3D animation software

Over the years, there have been countless forum threads and tutorials posted online about adding texture to models for 3D printing. One common recommendation is Blender, a popular 3D animation program. Autodesk’s Meshmixer is another option that usually gets suggested.
The problem with Blender and similar options is that you’re essentially learning an entire new program just for one specific purpose. Blender is primarily used for animated movies, CGI effects, and video games. You absolutely can add textures to 3D models with Blender, but it’s like building a pizza oven to heat up a Hot Pocket.
BumpMesh just does one thing: add textures to STL, OBJ, or 3MF models. That specialization makes it incredibly easy to use. You can add a texture and export it for your slicer in just a few clicks.
Just slap on a texture
It’s really that easy
Here’s how it works. First, head on over to bumpmesh.com in your browser of choice. You’ll be greeted with a teal cube covered in a scaly “Crystal” texture. Click “Load Model” at the top of the sidebar to choose an STL, OBJ, or 3MF file to import into the tool.
With the model in BumpMesh, you can change how it’s orientated by clicking “Place on Face” and choosing the face you want facing down. There’s also the option to “Rotate” the model. Once you have it situated, the fun begins.
BumpMesh includes 24 unique textures—called “Displacement Maps”—that can be placed on your model with just a click. It truly happens immediately, too. From there, you have a number of sliders and to fully dial in how the texture looks, but it’s all pretty straightforward. I won’t explain every tiny setting, but here are a few you should know:
- Texture Smoothing: Determines how aggressive the texture appears. The higher the value, the less detail you’ll see.
- Projection Mode: This is essentially how the texture is laid out on the model. For example, the “Cubic” setting applies the texture from six sides of a cube, whereas “Planar XY” is as if the texture is draped over top like a blanket. Play around with it to find what fits your model best.
- Texture Depth: Another setting that determines how aggressive the texture appears.
- Transform: A bunch of sliders to adjust the size of the texture.
- Masking: This is where you can choose which faces to apply the texture to. “By Surface” allows you to select or paint specific surfaces to exclude or include.
Once you have the texture and model looking good, the last step is to export it. BumpMesh gives you the option to export as STL or 3MF.
Make sure your slicer is set up for success
Modeling is only the first half of the process
As every 3D modeler knows, slicer settings are incredibly important in getting the best final result. It’s what ensures that the physical object matches the object you see on your computer screen. In the case of textures, there are a few key settings to note for the best quality.
The first is line width. Layer height determines the thickness of each horizontal layer, whereas line width determines the thickness of vertical walls and infill. For some textures, you’ll want to reduce the top surface line width, or you’ll lose a lot of detail—like drawing a line with a crayon vs a pen.

Another thing to play around with is called Variable Layer Height. Since 3D printers generally lay down material one layer at a time, curved surfaces will often have a rough, stepped texture. Some slicers—such as Bambu Studio—have tools for smoothing out these transitions and even enabling the nozzle to move up and down while printing the top layer.
Lastly, textures with flat surfaces, such as wood grain, can benefit from “ironing.” This is simply a final pass that moves the nozzle over the top layer to melt the material. It smooths tiny imperfections and evens out the surface. Ironing can make a shocking difference in the quality of the final print.

- Build Volume
-
256x256x256mm
- Printing Speed
-
600mm/s
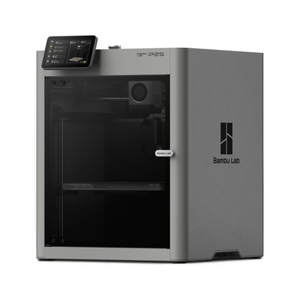
The Bambu Labs P2S 3D printer is ready to go out of the box and can have you printing within 15 minutes. It features up to 20-color printing with the AMS unit, has an upgraded built-in camera for remote monitoring and time lapses, and has an enclosed body for printing even high-temperature filament.
-
- Build Volume
-
10.4in x 10.4in x 10.4in
- Printing Speed
-
500mm/s
The Centauri Carbon is Elegoo’s first core XY printer, going up against printers like the Creality K1C, Bambu Lab P1S, and Bambu Lab X1 but at half the price in many cases. This would seem like a joke if the printer itself wasn’t so competent and well put together.