


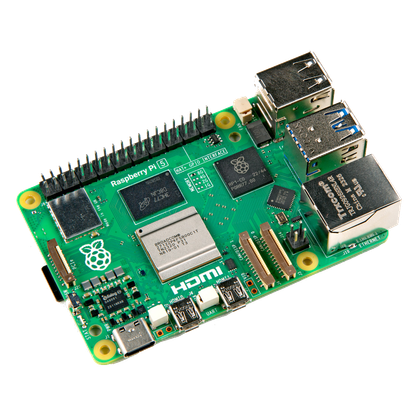



Raspberry Pi computers used to be cheap. Sadly, that’s not the case anymore as I write this, but you may still have more than a few older models lying around from the good old days when they were practically giving them away.
These boards were great back in the day, but software requirements keep going up, and you may find they no longer do the same job that you bought them for well enough for your needs. It does, however, seem like a shame to just throw them away, right? Well there are a few things you can do to
Replace the microSD card with an SSD
It’s the smart thing to do
Starting with the Raspberry Pi 3, you don’t actually have to use a microSD card as your boot drive. SD cards are a great solution for all sorts of projects, but they are notoriously unreliable, and quite slow. A USB SATA SSD (an NVMe model would be a waste on USB) will have a notable effect on how snappy your Pi feels.
Even the Raspberry Pi 3 generation can benefit. The Pi 3’s SD card reader is limited to around 20MB/s which is quite a bit slower than the USB 2.0 ports that model has. On a Pi 4 with a USB 3 port, you’ll get sustained speeds in excess of 300MB/s, as Jeff Geerling found during his testing.
Apart from big sequential speed gains, you’ll also get far more reliability, and much better random access performance. So if you want to use your Pi as any type of file or web server, this could go a long way to making it viable. Also, if you have a Pi with very little RAM, an SSD can go some way to making memory-swapping less of a performance killer, although it’s still not an ideal situation.

- Brand
-
Raspberry Pi
- Storage
-
8GB
It’s only recommended for tech-savvy users, but the Raspberry Pi 5 is a tinkerer’s dream. Cheap, highly customizable, and with great onboard specs, it’s a solid base for your next mini PC.
Install Raspberry Pi OS Lite instead of the desktop version
The (almost) zero calorie solution
Running a full desktop operating system might be too much for your old Pis now, but if you strip away all the fat, you might find there’s still enough performance left to do something useful.

One easy option here is the official Raspberry Pi OS Lite, which you can choose as an option when using the official Pi imager. This is a version of the OS with no graphical interface whatsoever. In most cases, after setting it up, you’re going to access it remotely. So, if you want to run Pi-Hole, Home Assistant, Jellyfin, or any other self-hosting service this option frees up heaps of CPU cycles and RAM.
It’s not the only option either. Armbian or DietPi might be a better fit depending on your performance and bundled software and configuration needs are.
Add an active cooling solution
We’re big fans of this option

Raspberry Pis are designed to need no extra cooling. You can just run the board straight out of the box, and it will work. However, that comes at a performance cost. If you do sustained loads, then eventually the CPU will have to slow down to avoid overheating. On newer models it also limits how high the CPU can clock itself, and of course if you’re into manual overclocking it puts those same limits on you.
Adding a $10 active cooler, or perhaps just any sort of passive heatsink, will unlock higher levels of performance either automatically, or with a little extra effort from you. In fact, unless you have a very specific reason not to do it, I think upgraded cooling is the first thing anyone should do with a Pi. I chose not to add a fan to my Pi 4 because it’s my HTPC solution, and I want that to be completely noiseless, but if I were running it as a NAS or media server, then bring on the big cooler!
Upgrade to a modern USB Wi-Fi adapter
A wireless boost for very little money
Some old Pi models don’t have built-in Wi-Fi, so adding a USB Wi-Fi dongle is an obvious upgrade that could turn them into useful smart home devices of some sort. However, even if you have a Pi that came with Wi-Fi, you can still add Wi-Fi via USB and improve reception, range, or performance.
It doesn’t just have to be Wi-Fi either, here’s a Pi upgraded with a Zigbee antenna.

You can also add a faster Ethernet port via USB if your Pi is limited to a 100Mbps Ethernet port. Since Raspberry Pis have so much versatility as network appliances, these are real and useful ways to turn an old board into one.
Install zram (compressed RAM)
This is an interesting one, since, of course, you can’t upgrade the RAM your Pi came with. If you have just one or two gigs of RAM, then the OS will start swapping RAM data to your SD card, or SSD if you went ahead and switched to that, as I suggested above.
With zram, your OS creates a compressed block of RAM that expands the amount of effective RAM you have. This puts some extra load on your CPU cores, but ultimately it’s a better tradeoff than swapping to secondary storage.