





Those Raspberry Pis you have sitting in a drawer aren’t doing you any good there. That’s why I have three fun and simple Raspberry Pi projects for you to try this weekend.

- Brand
-
Raspberry Pi
- CPU
-
Cortex-A72 (ARM v8)
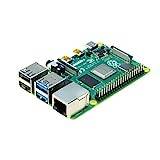
With the Raspberry Pi 4 Model B, you can create all kinds of fun projects, and upgrade gadgets around your home. Alternatively, install a full desktop OS and use it like a regular computer.
Keep tabs on your solar production with Sunalyzer
How much sun does your solar system actually receive?
Do you have solar panels on your roof and want to know how much sunlight your system receives? Well, there are expensive solar monitoring platforms out there, but your Pi can actually do it for free with Sunalyzer.
Sunalyzer is a free and open-source platform that’s designed to do all of your solar monitoring locally. Instead of just hoping that your setup is working properly, it analyzes everything and gives you all the information that you need about your solar setup, including production, consumption, battery behavior, and historical trends.
Sunalyzer is not only free and open source, but it’s also hardware-agnostic. It works with multiple solar panel controllers and allows you to integrate various brands under one solar-powered roof.
Deploying Sunalyzer is actually pretty simple. It doesn’t require any special hardware to connect to your solar setup; you just install it on your Raspberry Pi, add your solar panel’s compatible controller to Sunalyzer, and configure the cost side of things (like how much you pay or earn per kWh), and that’s it.
So, if you’re tired of using your solar panel’s cloud-based interface, spin up Sunalyzer and give it a try today. It’s free, so you have nothing to lose.
Turn your Pi into an inventory management platform with PiBarScan
Bring your Pi to the inventory, instead of your computer

Inventory management is something that you might not think of around your house, but it’s just as important in a home as it is in a business. There are many inventory management platforms out there that allow you to use barcode scanners for entering or removing items from the platform’s inventory.
Typically, the barcode scanner has to be connected to the computer running the software, but your Pi can actually act as an intermediary many times. You see, a Pi is lightweight and easy to power. You can even run a Pi off a portable battery if you want to walk around the house with it.
That’s where PiBarScan comes in. With PiBarScan, it can auto-detect barcode scanners via either Bluetooth or USB, and set everything up to work well. It can run headless, which means it can run without a user interface, making it perfect for that portable scanning setup.
What makes PiBarScan so powerful is its remote execution workflow. So, you can have it running on the Pi and executing commands on another system over SSH. Not only can it do that, but it also routes barcodes to different commands based on glob patterns.
If you’re still manually entering your home’s contents into an inventory management platform, you need to automate it with a barcode scanner. Thermal printers and labels are cheap, and it’s well worth the investment to make the entire experience smoother.
Put that old Pi and camera to use as a delivery camera notifier
You’re only a few tinkering steps away from a package delivery monitor

If you have a Raspberry Pi sitting in a drawer unused, it’s time to put it to use. With platforms like Home Assistant and either Scrypted or Frigate, you can actually turn that Pi into a delivery notifier.
Simply install any type of camera on the Pi, be that a USB camera or one that connects to the camera interface, and you’re almost ready to go. After that, you just need to expose the camera over the network.
Once you have that set up, you can bring that network camera feed into Home Assistant via either Scrypted or Frigate and parse it from there. Whether you use a local AI model or a cloud-based model, you can easily have Home Assistant, Scrypted, or Frigate parse the video feed to look for when a package arrives and send a notification if it sees that.
There’s a lot more benefit to having a setup like this, however. You can use the Pi’s camera feed for so much more. Set up person detection to know if there’s a person at the door. Train it to know the difference between a UPS, FedEx, USPS, or Amazon outfit to tell you who dropped the package off. Or, just tell it to notify you every time movement is detected.
Since this works with Home Assistant, you can also set up automations based around what the camera sees. For instance, if a UPS package is detected, you can have Home Assistant flash your office lights brown. Orange and purple for FedEx. Blue for USPS. Yellow for Amazon. The list goes on.
So, don’t leave that Raspberry Pi in the drawer. Go ahead and pull it out so that you can build this fun and simple project this weekend.
Your Raspberry Pis can do basically anything
The only limitation on what your Raspberry Pi can do is your own imagination. Today’s roundup above took bits and pieces of other projects I’ve talked about over the past year and combined them into a completely new project.
You could run Home Assistant on the same Pi that’s running the camera for your front porch, for instance. Or, you could have Homebox running on the same Pi that’s running PiBarScan.
Don’t let yourself be limited by just the projects that are pre-built on GitHub, either. The package delivery notifier isn’t a GitHub project, it’s simply taking a Pi, plugging a camera into it, and then feeding that camera elsewhere. Your Pi doesn’t have to do it all, it just needs to do something.